Ato Switcher
Live production video mixer appliance. Boot from ISO, connect your sources, go live.
↓ Download ISOWhat's Included
NDI Input
Receive NDI sources from any device on the network
SRT Input/Output
Low-latency SRT ingest and push to any SRT endpoint
Media Playback
Play MP4, MKV, MOV files with loop support
Transitions
Cut, crossfade, dip-to-black, wipe, fade-to-black
Image Overlays
DSK channels with PNG overlay support (lower thirds, bugs)
WebRTC Preview
Remote control via browser — no client software needed
RTMP Output
Stream to YouTube, Twitch, or any RTMP ingest
Recording
Record program output to MP4 or MKV
1 Requirements
Minimum
| CPU | x86_64, 8+ cores |
| RAM | 8 GB |
| Storage | 200 GB+ |
| Network | Gigabit Ethernet (required for NDI) |
| USB Drive | 4 GB+ for ISO boot |
Recommended
| CPU | x86_64, 16+ cores |
| RAM | 16 GB |
| Storage | 200 GB+ SSD (for recordings and media) |
| Network | Gigabit Ethernet |
Works on bare metal, Proxmox VMs, and other hypervisors. For VMs, allocate at least 8 vCPUs and 8 GB RAM. Recommended: 16 vCPUs, 16 GB RAM, and 200 GB+ storage.
2 Flash the ISO
Write the ISO to a USB drive using one of these tools:
Windows
Use Rufus — select the ISO, choose your USB drive, click Start. Use DD mode if prompted.
macOS / Linux
sudo dd if=ato-switcher-dev.iso of=/dev/sdX bs=4M status=progress
Replace /dev/sdX with your USB device. Use lsblk to find it.
Proxmox / VM
Upload the ISO to your Proxmox storage, create a VM, and attach the ISO as a CD-ROM. Boot from it.
3 Boot & Setup Wizard
Boot from the USB drive (or VM CD-ROM). The system will start automatically and present a setup wizard on the console:
- Keyboard layout — select your keyboard language
- Hostname — set the device name on the network (default:
ato-switcher) - Network — configure DHCP or static IP
- Admin password — set a password for SSH access (user:
ato-admin)
After the wizard completes, the mixer starts automatically.
4 Connect
Open a browser and navigate to the device's IP address:
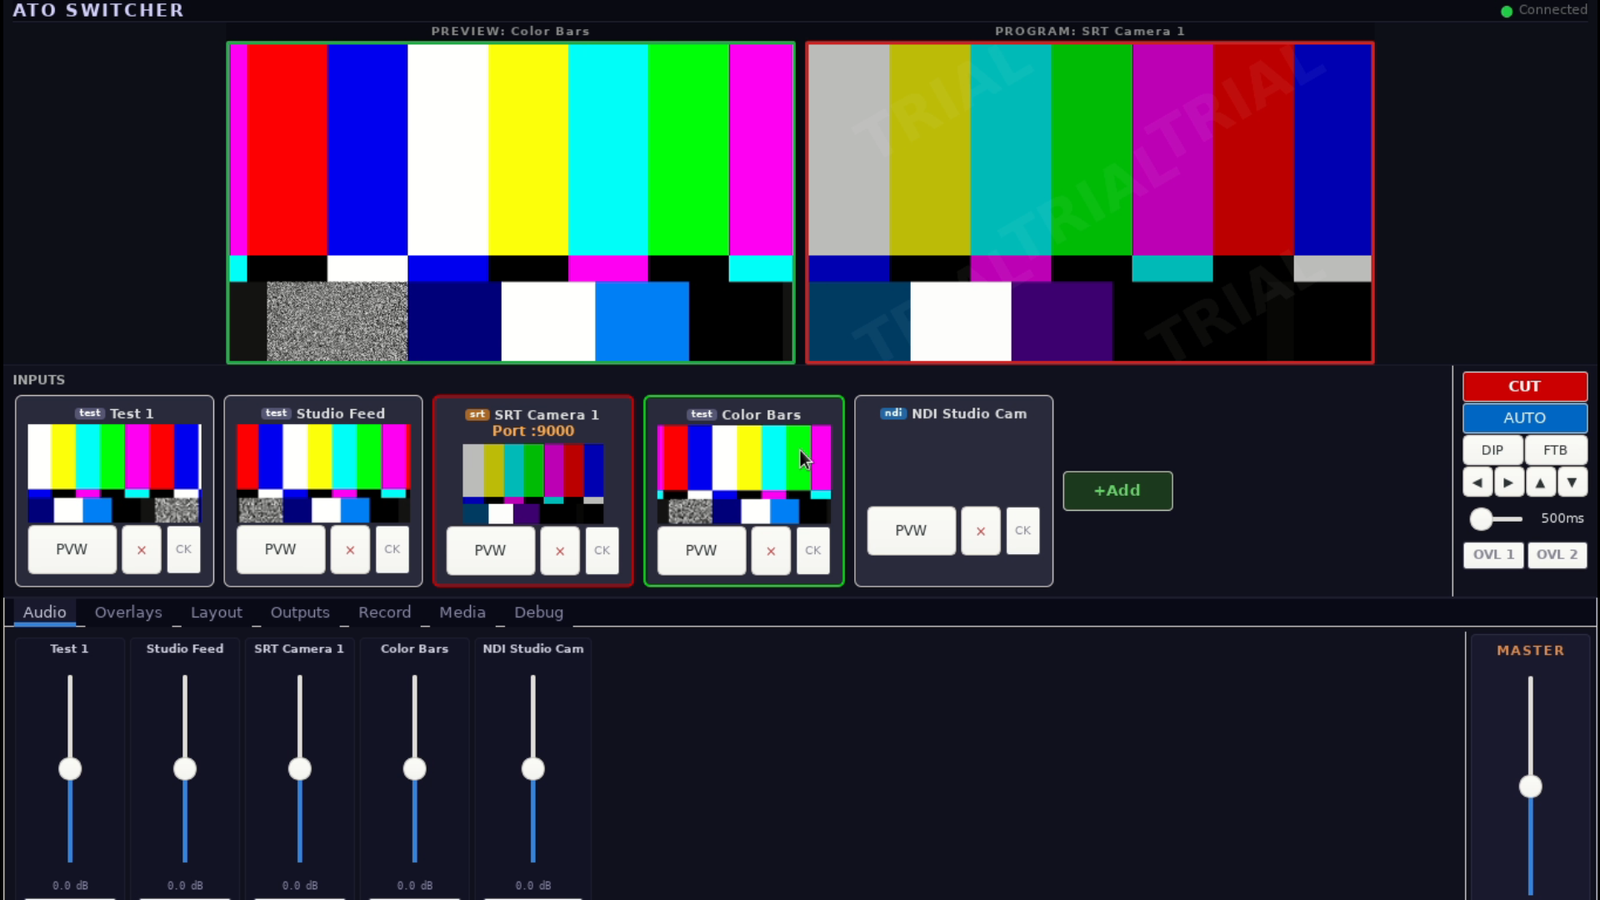
- Mixer Desktop —
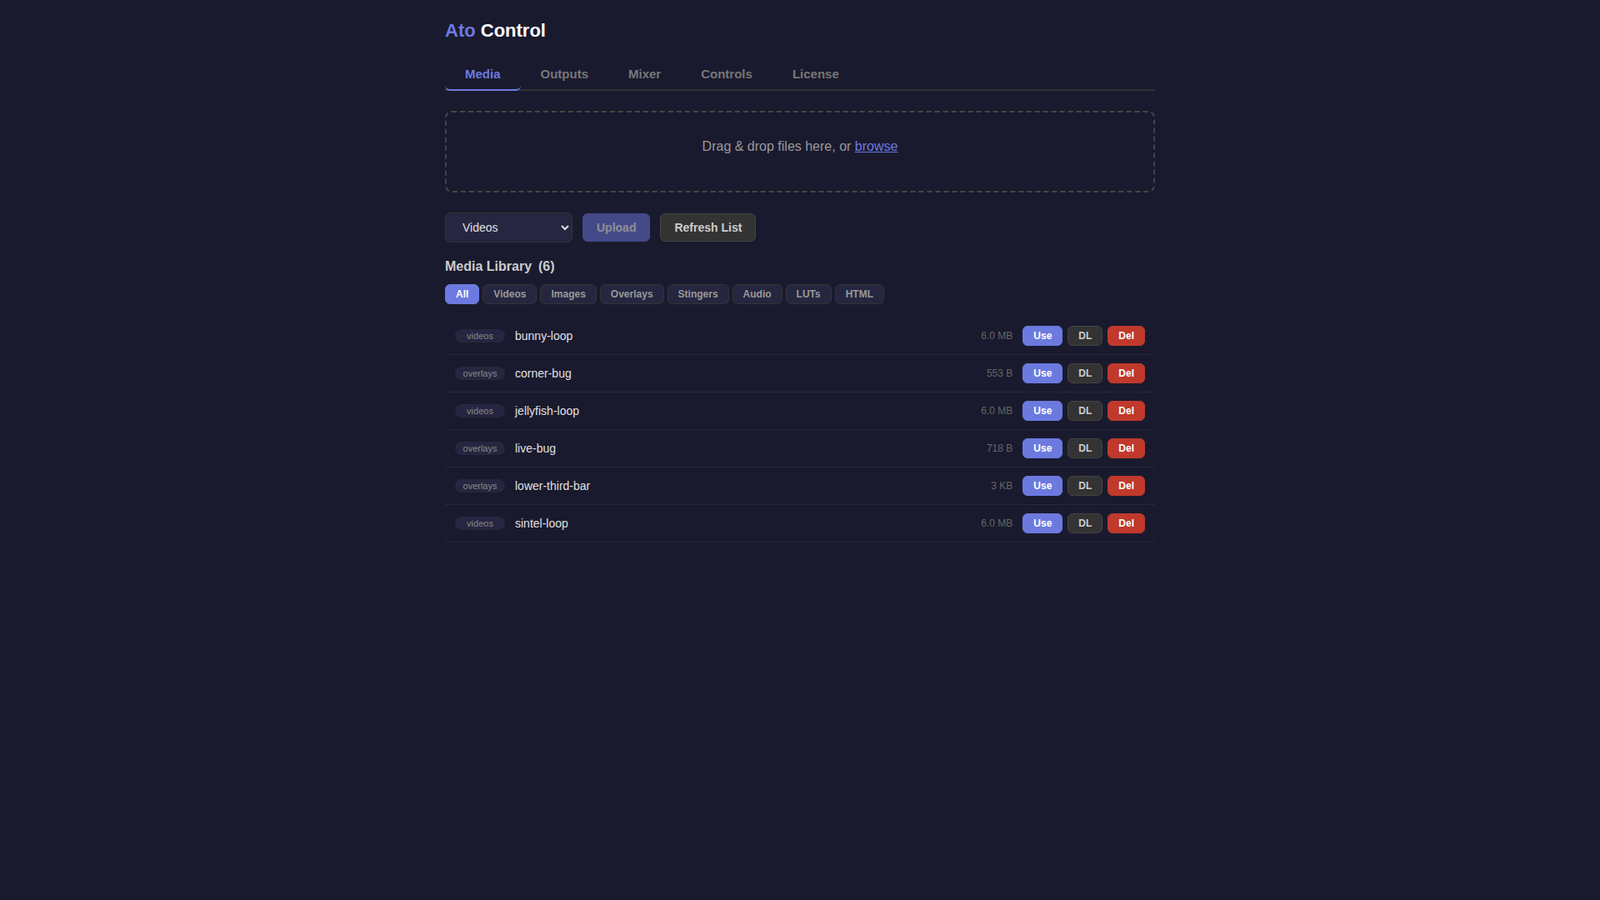
http://<ip>:3000— full desktop with program/preview monitors, transitions, audio meters - Control Page —
http://<ip>:8000— lightweight web interface for media upload, overlays, outputs, and recording - REST API —
http://<ip>:8000/api/— full API for automation and integration
The IP address is displayed on the console after boot. You can also run show-ip from the console at any time.
5 Quick Start
- Add inputs — connect NDI sources, SRT streams, or upload media files via the control page
- Switch — use the Mixer Desktop to cut, crossfade, or wipe between sources
- Add overlays — upload PNG images, assign to OVL 1 or OVL 2 in the Overlays tab, toggle on/off
- Add outputs — configure SRT push, RTMP stream, or NDI output via the control page or API
- Record — start recording to MP4 or MKV from the control page
NDI Configuration
NDI sources are auto-discovered on the same subnet. For sources on different subnets or VLANs:
- SSH into the device:
ssh ato-admin@<ip> - Edit
/etc/vismixer/default.conf - Add:
NDI_EXTRA_IPS=192.168.1.100,192.168.1.101 - Restart:
sudo systemctl restart ato-switcher
SRT / RTMP Output
Add outputs via the control page or API:
# SRT Push
POST /api/outputs
{
  "type": "srt",
  "url": "srt://destination:9000",
  "auto_start": true
}

# RTMP Push
POST /api/outputs
{
  "type": "rtmp",
  "url": "rtmp://live.twitch.tv/app/YOUR_STREAM_KEY",
  "auto_start": true
}
Install to Disk (Optional)
The ISO runs as a live system by default. To install permanently to the internal disk:
- Log in via console or SSH
- Run:
sudo install-to-disk - Follow the prompts to select the target disk
- Reboot and remove the USB drive
This will erase the target disk. Make sure you select the correct device.
SSH Access
ssh ato-admin@<device-ip>
Use the password you set during the setup wizard. Useful commands:
show-ip— display current IP addresswizard— re-run the setup wizardsudo journalctl -u ato-switcher -f— view live mixer logssudo systemctl restart ato-switcher— restart the mixer